

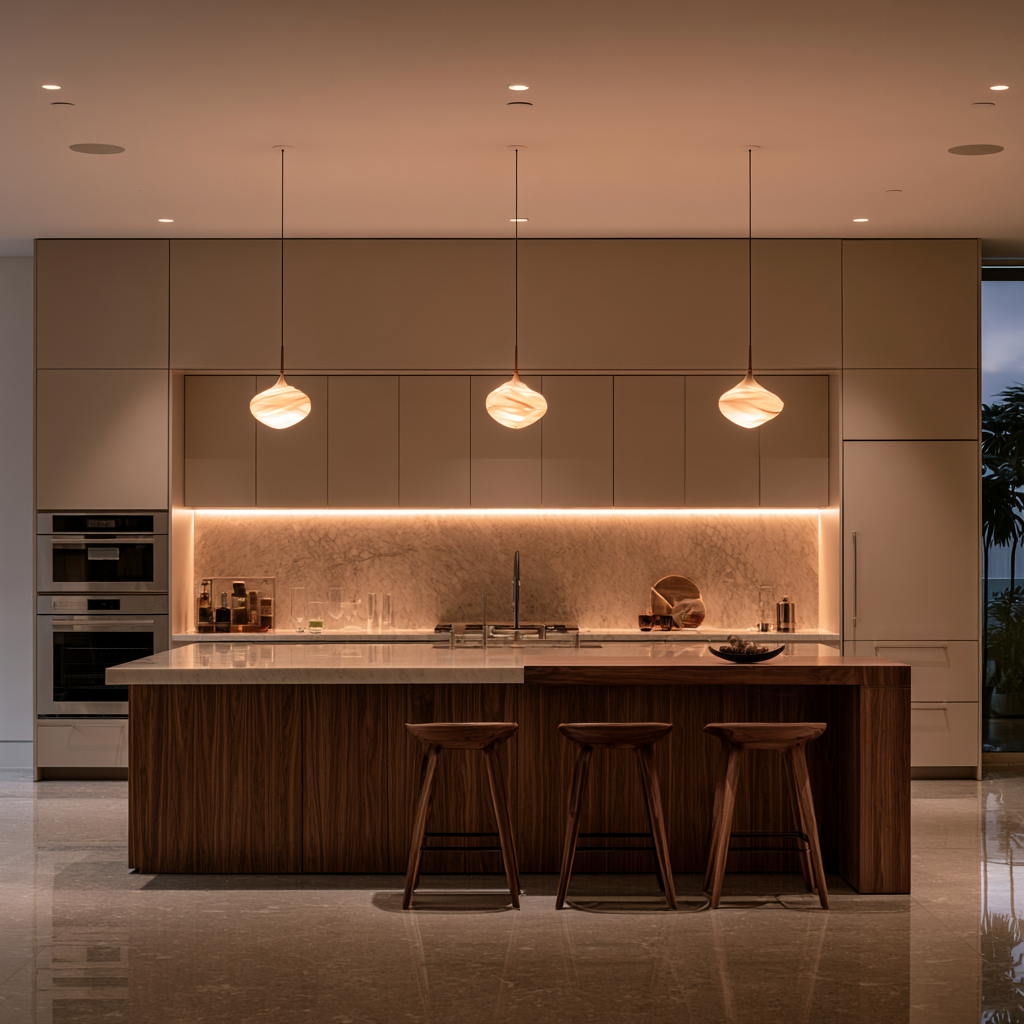
Layer your kitchen lighting with recessed cans for even ambient coverage, pendants focused over the island, and under-cabinet LEDs to remove shadows from prep counters. Position cans slightly in front of countertop edges, use glare-controlled pendants about 30–36 inches above the island, and mount LED strips near cabinet front edges in diffused channels. Match color temperatures, choose high-CRI dimmable fixtures, and control each layer separately. The details below help you refine spacing, output, and scenes.
Plan Your Kitchen Lighting Layers
Start by dividing your kitchen lighting into three working layers: ambient, task, and accent. Ambient light establishes safe, even circulation through recessed cans or a central fixture. Task light targets prep zones, sinks, and cooktops, typically with under-cabinet LEDs or focused pendants. Accent light adds depth by highlighting shelving, architectural textures, or display areas.
Map each layer against your kitchen’s workflow before selecting fixtures. Identify where you chop, read controls, clean, and serve, then prevent shadows created by upper cabinets or your own stance. Consider ceiling height, cabinet layout, island dimensions, finishes, daylight exposure, and switching zones as core design considerations. Smart controls let you tune scenes for cooking, dining, and nighttime navigation. Coordinate color temperature and beam spread across fixtures so the system feels integrated. These lighting variables create a flexible, high-performance kitchen without visual clutter.
Set a Kitchen Lighting Lumen Target
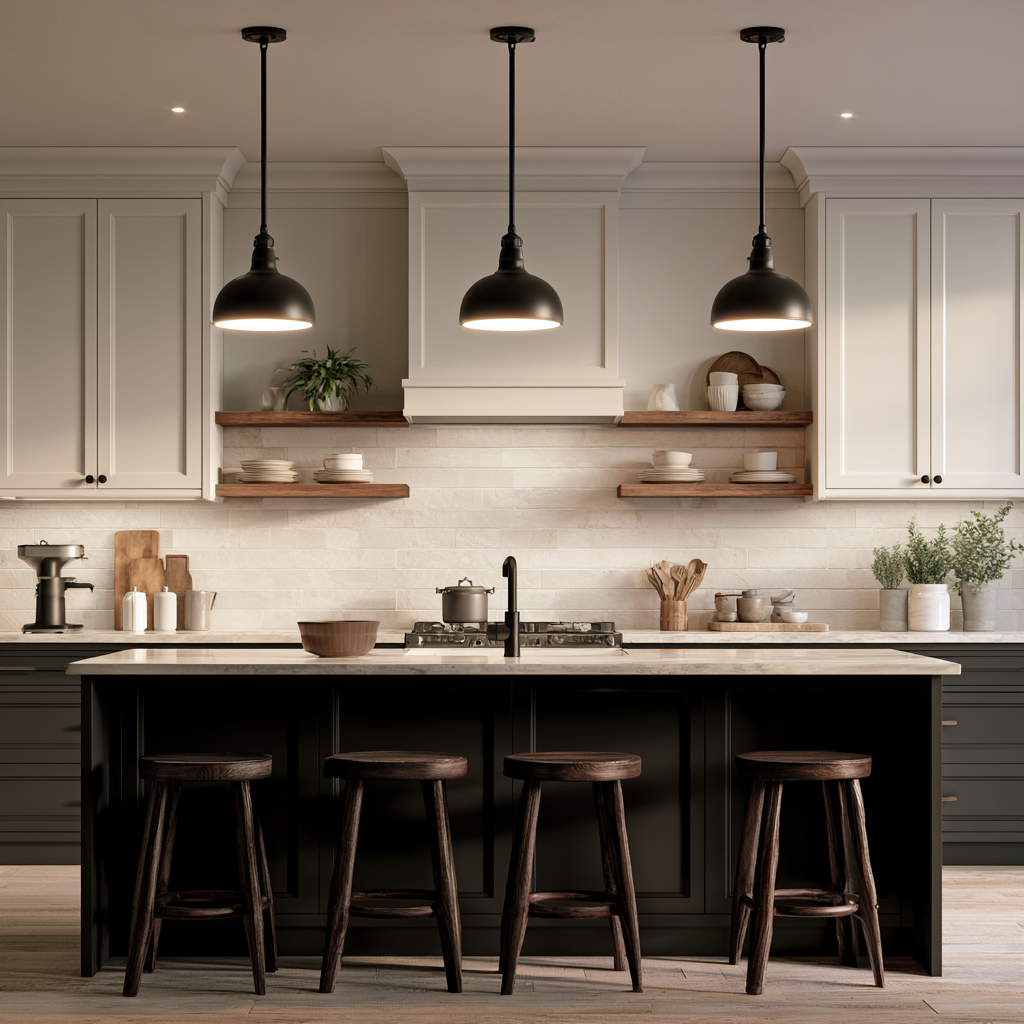
With your lighting layers mapped, set a lumen target for each zone rather than choosing fixtures by wattage alone. Lumens measure usable light output, so they give you a more reliable baseline for performance and comfort. Start with your kitchen’s square footage, then assign output according to activity: lower levels for circulation, stronger illumination for prep surfaces, and focused brightness at the sink or cooktop.
For practical Lighting calculations, multiply each zone’s area by its recommended foot-candle range, then convert that requirement into total lumens. Account for dark cabinetry, matte finishes, ceiling height, and daylight, since each affects perceived brightness. Specify dimmable LEDs and compatible controls so you can tune output after installation. Among your Subtopic ideas, prioritize adjustable systems that let you refine task, ambient, and accent layers without wasting energy.
Plan Recessed Kitchen Light Coverage
Map recessed cans around primary work zones—sink, cooktop, island, and prep counters—before filling general ceiling space. Space fixtures to overlap beam spread evenly, using the ceiling height and trim angle to set placement. Position cans slightly in front of countertop edges so your body won’t cast shadows onto the work surface.
Map Work Zone Coverage
Before choosing fixture spacing, sketch each kitchen work zone—the sink, cooktop, prep counters, island, and pantry—and place recessed cans to light the task surface rather than the center of the room. This map work process reveals where cabinetry, tall appliances, and your own body could cast shadows. Build a coverage map that identifies primary task planes, circulation paths, and transition areas between them.
Mark sink bowls, cutting zones, cooktop controls, and pantry shelves as priority targets. Then note where pendants or under-cabinet LEDs will contribute layered illumination, so recessed lighting supports rather than duplicates those sources. Use your kitchen’s workflow to test the plan: groceries move from pantry to prep counter, then to cooktop and sink. Your lighting layout should follow that sequence, delivering clear, controllable visibility at every active surface without leaving dark functional gaps.
Space Cans Strategically
How you space recessed cans determines whether your kitchen gets even task light or a patchwork of bright spots and shadows. Build your layout from ceiling height, beam spread, and fixture output—not a generic grid. Strategic placement creates a responsive lighting layer that supports prep, cooking, and circulation without over-lighting the room.
- Divide ceiling height by two for a practical starting spacing rule.
- Align rows with primary work zones and island edges.
- Use narrower beam angles for focused, high-output illumination.
- Keep fixture spacing consistent to preserve visual rhythm.
- Specify dimmable, high-CRI LEDs for tunable performance.
Avoid placing every can at equal room intervals; kitchens rarely function as symmetrical boxes. Instead, space cans around the activity map you created, then model coverage before cutting drywall. A lighting plan delivers scalable control, cleaner architecture, and efficient energy use.
Prevent Countertop Shadows
Countertop shadows form when recessed cans sit behind the person working at the counter, so place the primary row roughly 20 to 30 inches out from the wall cabinets rather than centered over the aisle. This forward offset directs light onto prep zones before your body blocks it. Align each can with countertop workstations, sinks, and cooktops, using beam spreads that overlap slightly for continuous coverage. Subtopic misalignment occurs when fixture spacing follows room geometry instead of task geometry, creating dark seams along the backsplash.
Add under-cabinet LEDs as a low-level task layer, not a substitute for properly positioned cans. Aim recessed trims away from glossy counters and cabinet faces to reduce Hidden glare. Dimmable, high-CRI LEDs let you tune output for chopping, cooking, and cleanup while preserving visual comfort across the kitchen.
Space Recessed Lights Away From Cabinets
Place recessed cans far enough from upper cabinets to light the work surface rather than casting shadows from the cabinet faces. Your space planning should align each fixture with countertop zones, not ceiling symmetry. In most kitchens, position trims roughly 20 to 30 inches from cabinet fronts, then verify beam spread against ceiling height and lumens.
- Map cabinet placement before finalizing electrical rough-in.
- Center light output over the usable counter depth.
- Select wide-beam LED modules for even coverage.
- Use adjustable trims near tall pantry edges.
- Mock up locations with temporary work lights.
This layered approach makes prep areas brighter without overlighting the room. You’ll create a cleaner visual plane, reduce contrast at backsplash lines, and give smart dimming systems more useful, zone-specific control. Review the layout after cabinets are installed; small shifts can correct real-world obstructions.
Choose Island Pendants for Task Lighting
Island pendants should deliver focused light across the work zone without blocking sightlines or competing with recessed fixtures. For effective island pendant selection, prioritize fixtures with controlled downward distribution, glare-reducing diffusers, and high color-rendering LEDs. You’ll see ingredient colors accurately, read measurements clearly, and reduce shadows during prep.
Choose dimmable pendants with compatible controls so you can shift from bright chopping light to softer entertaining illumination. A warm-neutral color temperature, typically 3000K, integrates smoothly with most kitchen layers while preserving a clean, contemporary appearance. Consider tunable-white or smart-enabled models if you want adaptive scenes, voice control, or automation tied to occupancy and daylight.
These task lighting tips keep the island functional: use pendants as dedicated work light, let recessed cans supply ambient coverage, and reserve under-cabinet LEDs for counter tasks.
Size and Hang Island Pendants
Once you’ve selected task-focused fixtures, size and hang them to match the island’s proportions and preserve clear sightlines. Your pendant layout should distribute usable light without crowding prep zones or interrupting conversation. Evaluate island scale, ceiling height, fixture diameter, and seating before finalizing junction-box locations. A clean, calibrated installation makes the lighting feel intentional and technically integrated.
- Use two pendants for compact islands; use three for longer runs.
- Keep fixture centers evenly spaced, typically 24 to 30 inches apart.
- Choose diameters that leave visual breathing room at each island end.
- Hang bottoms 30 to 36 inches above the countertop.
- Raise pendants slightly for tall users, low ceilings, or open sightlines.
To size and hang confidently, mock up dimensions with paper templates or adjustable cords. You’ll spot glare, visual bulk, and spacing conflicts before installation.
Add Under-Cabinet LEDs for Clear Counters
Under-cabinet LEDs eliminate the shadows that upper cabinets cast across your countertops, giving you direct, even light for chopping, measuring, and cleaning. Mount continuous LED tape or slim linear bars near the cabinet’s front edge to push illumination across the full work surface, not just the backsplash. Use aluminum channels with diffusers to reduce diode spotting, protect the fixtures, and create a clean integrated finish. Hardwire the under cabinet system to a dedicated switch or smart dimmer so you can set task light independently from recessed cans and pendants. Select high-CRI LEDs to reveal ingredient colors, surface textures, and spills accurately. Keep drivers accessible inside a cabinet or serviceable junction box for easier maintenance. Coordinate color temperature with your other kitchen layers to prevent mismatched light.
Choose Under-Cabinet LED Color Temperature
Match your under-cabinet LEDs to the color temperature of nearby recessed cans and pendants for a unified lighting layer. Use 2700K–3000K to keep wood tones and painted cabinets warm, or choose 3500K–4000K for a crisper task-lighting effect. Balance the output so your counters look bright without making the kitchen feel clinical.
Match Color Temperature
Choose under-cabinet LEDs that align with your kitchen’s dominant light source, typically 2700K–3000K for warm, traditional spaces or 3500K–4000K for crisp, contemporary task lighting. Matching color temperature prevents visual breaks between recessed cans, pendants, and countertop illumination, strengthening layering benefits without introducing competing tones.
- Compare LED specifications before selecting fixtures.
- Match cabinet lighting to your ceiling-light Kelvin range.
- Use tunable-white strips for adaptable smart controls.
- Check samples against backsplash and countertop finishes.
- Keep all task-zone LEDs within one consistent range.
You’ll create a unified light field that makes materials read accurately and supports precise prep work. For advanced installations, connect compatible fixtures to a centralized controller, so preset scenes maintain consistent output across every lighting layer throughout the day.
Balance Warmth And Brightness
The right LED color temperature balances inviting warmth with the clear visibility you need for chopping, measuring, and cleaning. For most kitchens, specify under-cabinet strips between 3000K and 3500K: 3000K supports balanced warmth around wood, stone, and warm metals, while 3500K sharpens contrast on pale counters and stainless finishes. Match or stay within 500K of your recessed cans to prevent distracting color shifts across work zones.
Build brightness planning around task performance, not just ambience. Aim for evenly diffused output that eliminates shadows at the backsplash and counter edge, using high-CRI LEDs—90+ CRI reveals ingredient color accurately. Install channels with frosted lenses to soften diode hotspots and protect the strips from moisture. If your kitchen changes roles throughout the day, add dimmable, tunable-white LEDs so you can shift from focused prep light to relaxed evening illumination.
Put Each Kitchen Lighting Layer on Controls
Why put every kitchen lighting layer on its own control? You gain precise atmosphere, efficient energy use, and better task visibility without overlighting the room. Smart zoning controls let you tune illumination by activity, while thoughtful layer management keeps ambient, task, and accent sources working independently.
- Dim recessed cans for relaxed evening circulation.
- Brighten pendants when you’re plating or hosting.
- Activate under-cabinet LEDs for focused prep work.
- Set scene presets for cooking, dining, and cleanup.
- Use compatible smart dimmers for responsive automation.
Choose LED-rated dimmers and verify load compatibility before installation. You’ll avoid flicker, protect driver performance, and retain smooth dimming across fixtures. Group controls logically near entry points, then add app or voice access where it genuinely improves your routine. Separate control paths turn a fixed lighting plan into an adaptable kitchen interface.
Avoid Common Kitchen Lighting Layout Mistakes
Avoid treating kitchen lighting as a grid of fixtures placed by symmetry alone. You’ll create shadows if recessed cans sit behind you at prep counters, and you’ll waste output by spacing them without regard to cabinet runs, islands, or appliance zones. Position task lighting to illuminate the work surface from the front or side. Keep pendants scaled to the island, with clear sightlines and sufficient headroom. Don’t rely on pendants as the only island light; add focused downlighting where detailed prep occurs. Specify under-cabinet LEDs near the cabinet face to prevent backsplash glare and light the counter evenly. Avoid overlapping beams that produce hot spots, but don’t leave perimeter zones dim. These ideas subtopic priorities help you avoid kitchen design mistakes while building a responsive, layered lighting system.
Frequently Asked Questions
How Much Does Professional Kitchen Lighting Installation Typically Cost?
You’ll typically pay $1,500–$6,000 for professional kitchen lighting installation, depending on fixture count, wiring complexity, labor rates, and smart-control integration. Basic replacements may cost $500–$1,500, while a full electrical redesign can exceed $10,000. For two word discussion ideas, compare “fixture upgrades” and “circuit capacity.” Your budget considerations should include permits, drywall repair, dimmers, LED drivers, and future-ready automation. Get itemized bids to evaluate technical scope accurately.
Do Kitchen Lighting Fixtures Need to Match Appliance Finishes?
No, your kitchen lighting fixtures don’t need to match appliance finishes exactly. You create stronger lighting coordination by repeating compatible tones, such as warm brass with stainless steel or matte black with dark hardware. Prioritize fixture scale, color temperature, and beam control over perfect finish matching. You can mix metals intentionally when each appears at least twice, giving your kitchen a cohesive, high-performance look with visual depth and adaptable, modern character.
Can Smart Bulbs Replace Dedicated Dimmer Switches?
Yes, smart bulbs can replace dimmer switches in many fixtures, turning your kitchen lighting into a responsive control layer rather than a fixed circuit. You adjust brightness, color temperature, schedules, and scenes from an app or voice assistant. However, don’t install smart bulbs on traditional dimmers unless manufacturers approve it; the dimmer can cause flicker or connectivity failures. For multi-bulb circuits, a dedicated smart dimmer often delivers smoother, wall-accessible control.
What Kitchen Lighting Options Work During Power Outages?
You can keep your kitchen lit during outages with rechargeable LED lanterns, battery-powered task lights, and USB LED strips. Add portable outlets with integrated power banks to run small fixtures or charge devices. For seamless operation, connect selected lighting circuits to a battery backup or home energy storage system. Choose warm, high-CRI LEDs for food prep, and stage lights near counters, the pantry, and exits for reliable, low-glare visibility.
Are Permits Required for Adding New Kitchen Lighting Circuits?
Like a circuit breaker guarding a grid, permits are usually required when you’re adding circuits for new kitchen lighting. You’ll need to follow local electrical codes, obtain inspections, and use appropriately rated wire, breakers, and GFCI/AFCI protection where required. Your licensed electrician can size the load, preserve panel capacity, and integrate smart controls safely. Check with your local building department first, since rules and homeowner allowances vary by jurisdiction.
Conclusion
Layer your kitchen lighting like a well-organized prep station: each tool has a job. Aim for roughly 30–50 lumens per square foot, then use recessed cans for general coverage, pendants for island tasks, and under-cabinet LEDs to erase counter shadows. One homeowner compared her finished plan to a three-tier cake: ceiling light formed the base, pendants added focus, and LEDs supplied the final detail. Put every layer on dimmers so you can tune the room for cooking, cleaning, or relaxing.


